Soft Sculpture And Stuffies

A site to talk about my soft sculpture and stuffed toy creations, paper doll artwork and tarot card art in progress. All are creative endeavors for selling at Medieval events.

Name:
Location: Milwaukee, Wisconsin, United States

I'm a science fiction fan from wayback, artist, soft sculpture toy designer and cat owner.

Saturday, December 15, 2018

More Nip Bottle Labels

Here's a few more.

Image result for cat standing on back legs
Norman Wasn't As
Scary As He Thought

Image result for contented sleeping kitty
CIA Cat bugged your office.
With CRICKETS!

Image result for kitty face expressions
Inferior Catnip Does THIS To Your Cat

Image result for smug cat
Smug Cat Knows Things YOU Don't

Image result for suspicious cat
Suspicious Cat Is Suspicious
You don't have clearance for catnip

Image result for cat with open mouth
Feline Laughing Potion

Image result for angry cat
Yes Mr. Bond. I DID Take Your Catnip

Labels For Catnip Bottles

Finding enough 'good' cat images online to make up labels for those little liquor bottles I've been filling with dry catnip has been fun.  The trick is to locate something simple, no distracting background images, with the cat face right up front and some good expressions.  Then add the text underneath that works with the image.

Here's a few ---

Image result for Annoyed Cat
Ha Ha Ha!  You A Funny Guy!

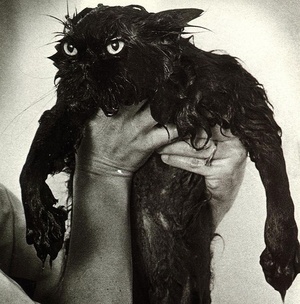
Image result for Wet Cat
I Thought The Bathtub Was Empty....
See the source image
Wet Cat Ale, For When You're
Having a VERY Bad Day

See the source image
Bob's attempt at falconry didn't end well

See the source image
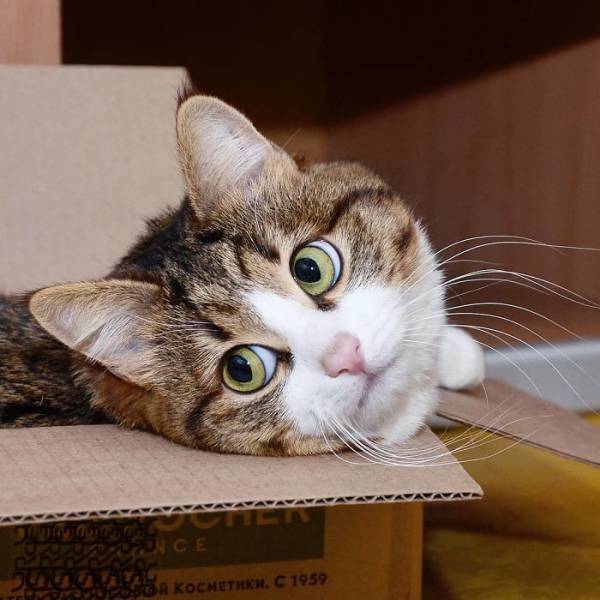
I could have a bigger box, if
there was a bigger box here

Related image
Hiding The Catnip

Image result for cat with tongue out
What?  We're Just Playing!

 Image result for cat laughing
Herman Always Laughed At
His Mouse Jokes

Saturday, August 25, 2018

Mini Mandrake Root Cat Toy

I used the same basic pattern as the regular sized mandrake root and shrunk it down to 4" tall, doing the shape out of beige velour.  The leaves on top were done out of green felt, and I used 4mm black beads for eyes (keep them tiny!).  The roots were textured brown/tan/gold hairy yarn strands tied into a knot in the middle so when they're sewn in they won't pull out.

The result was immensely cute!  I gave them a soft sculptured frown and pursed lips via needle sculpting, and did indications of arms and a leg division but also made sure there were bumps and angles sewn across the front of them. It took maybe 10 minutes to needle sculpt the bodies but it was worth the effort.  

Catnip inside = cat toy.  Done without catnip you can put a split ring on and make them a keychain charm.

Saturday, July 28, 2018

When It Rains, It Pours.....

I'm way behind on the amount of cat toys I need to make.  Two Ren Fairs are carrying my stuff, I just got an order from a local store for 3 dozen Kitty Ding Dongs, and someone else wants 150 toys shipped to her asap, AND Jim placed an order for 100 bags of nip and 144 mice. He got them into a local pet store along with his home made cat trees.

I'm swamped!!!!!  I just wish I could find more catnip growing locally.  It's not been a good growing year for it this year. Two other people who make cat toys have said the same thing to me, they're having a hard time FINDING it growing in the wild.

Sunday, July 01, 2018

It's Peanut Butter Jellyfish

Yes, I know it's a cheesy idea.  A friend wanted me to make up a bunch for her and had found fabric with peanuts printed on it, and fabric with strawberries printed on.  I've looked at what's been done by others with the jellyfish idea and most of them are pretty simple. A flat circle with a ball underneath and then the dangles. 

The crocheted ones I've seen online over on Etsy do look nice (but I don't crochet) so I'll have to figure out what to use for the dangles.  Ribbon?   Strips of polar fleece?  Cording?  They can't be too long, I don't want any cats to be chewing them off and eating them.  

Tuesday, June 19, 2018

And...........Wow, Sometimes The Design Turns Out Different

Given the variety of short cropped, super soft fake fur available I got some of that gray chinchilla colored stuff, some deep chocolate brown and some of the swirl white that's been at JoAnn Fabrics lately.  Just 1/4 yard of each. I wanted to make a set of differently colored fuzzy mice but still stick with using only natural colors.

Most of my catnip mice are cut in a rounded 'V' shape but this time I wanted them longer so I cut out a rectangle 4" by 4 1/2" in shape.  I folded it in half the long way and sewed them, tapering down at the far end to make the pointy nose.  

They were turned and stuffed, tails put on, and ears/eyes added.  However, laying the finished mice out side by side I saw that they unfortunately resembled a line of dead mice....  Eww!

Well, they may not be 'cute' as the others are, but I can advertise them as 'pre-killed for your convenience' and see how that goes!  No sense in wasting them.  I did a dozen in each color.  Sets would be one brown wood mouse, one gray house mouse and one white (with red eyes) laboratory mouse, all nicely lined up in a zip lock baggie or plastic container. 

Monday, April 02, 2018

Horsie Sticks

I've located some photos of what I used to make for Pennsic War -- horse headed sticks with ribbons.  They were very easily done too. 

Get yourself some black acrylic paint.  Take a 1/4" wood dowel (they have yellow painted ends here, but ask at any hardware store about which are that width, the thinner ones might look nice but they break almost immediately so use 1/4" ones).  The dowels cost me 69 cents each.  I measured to see where the midpoint was on the length, set the dowel on a table with a sharp edge and pressed down to break the dowel into two equal lengths. It avoided me having to find a saw to do this part.


Paint the dowels, give them 2 coats so they're solid black with no streaking.  When dry take a bottle of Elmer's Glue and remove the top. Dip the broken end of the wood dowel into the glue so the last 2" are fully coated with the glue.  Then take a small wad of stuffing and wrap it around the glue area making sure the end is covered too, so it does not poke out the top of the horse's head and damage the fabric there.   I used a rubber band around the stuffing to keep it tightly in place.  No need to remove the rubber band later either, just leave it on.  Let it dry completely.


Take 1/4" wide ribbon, you can get spools of it for 50 cents each at JoAnn Fabrics. I used four colors, each strand was as long as a wood dowel, fold the ribbons in half and knot them in the middle so you have 8 strands all attached at one end. Set aside.


The main pattern for the head was just an outline of a horse's head about 5" tall and 4" wide.  Sew it with right sides together but leave open the bottom (which I sort of rounded).  Turn, stuff the muzzle, set aside.  Cut out two felt ears that match the body color, set aside.  Eyes are two 8mm faceted black plastic beads.


Slide the stuffing wrapped end of the wood dowel into the head. Stuff more fiberfill around it with a pencil to fully stuff the head section.  Take a needle and thread and do a running gather stitch around the bottom of the head, slowly tighten it as you tuck the ends of the fabric up inside for a clean look, adding more stuffing if needed. Before you close the bottom completely, insert the knotted end of the ribbons in and stitch the opening completely closed, MAKING SURE you go through the ribbons section at least twice so they don't pull out if someone yanks on them.


Add the ears and eyes with hand sewing.  For the mane, take a feather boa (JoAnn Fabrics has them for $5 or so, you only need a 4 or 5" length so one boa will make you at least 8 horsie sticks) and cut a length that's 5" long. Use your fingers to pull any loose feathers off the ends - it's best to do this part outside.  Now take your Elmer's Glue and do a thick line from the forehead down the backbone to just above the base of the neck (see photos).  Before it runs all over the place press the feather boa section down firmly and then let it dry overnight.  It will hold the mane in place very well.


With the bottom picture I used woven fringe, but I didn't like the effect as much as the feather boa style.  The woven fringe was sewn in down the back of the head when I machine sewed that part of the project (so there was no glue involved in attaching it).


Be creative with colors!  Fantasy horses are fine.  Unicorns with attached horns work too.  I've tried sewn horns, felt horns and even got some of those Christmas decorations with the plastic 'icicles' for horns** - which look fantastic by the way but they're dangerous if given to kids so beware! -- and those were just some of the variations you can try.


** If you DO use the plastic icicles, you leave an opening in the forehead to slide them in from underneath, and treat the base of the icicle just like the wood dowel, where you dab it in glue and wrap stuffing around it so it's larger than the opening and can't be pulled out. When dry, slide the horn up into the open forehead stitching and check that the opening is tight, you may have to take a hand stitch or two there to make sure of that.




Wednesday, March 28, 2018

Butterflies, Simple & Easy

I've worked with butterfly wing designs before, but other than the Luna Moth, most weren't all that memorable.  So I did some online picture research and started sketching out wing patterns and eventually came up with one design that I liked.  It's got a 6" wingspread from tip to tip, is all done as one piece so I don't have to do an upper and lower wing set separately, and it's simplified enough that I can do up 20 at a time fairly easily.

The design works with polar fleece, but could just as well have the bottom layer be felt for added stiffness.  I wasn't planning on stuffing the wings but they were so limp that I ended up suing a thin layer of stuffing between them.  The outline was sewn all the way around and I tucked in a 4" section of rat tail cording (2mm size) with knots on the end for the antenna as I machine sewed across the upper part of the wings.  There were indents between the upper and lower parts, clipped/trimmed close with a scissors after I went all the way around. Then I did a small slice where the body would be and stuffed the wings lightly.

All that was needed was a body, which I use the grey fake fur fabric for visual texture.  I had bits and pieces of that plus some bits from the Soft & Cuddly brand fuzzy fabrics, so I can do different colored bodies.  Once the vaguely rectangular circle was gathered and stuffed I just tacked it down tightly to the wings on top as a 'body' and then added 8 mm black pony bead eyes and it was done.  

They work best with a printed top and solid complementary color underside. No turning, no piecing wings together. Simple and fast.  They make good decorative pieces for hairbands, or kids toys, package decorating pieces OR cat toys!  The catnip goes into the butterfly body not the wings.  Finished size of the wings is 6" x 4".